How to Make Scrappy Improv Binding
Share
Do you have a bunch of leftover scraps in weird shapes that you'd like to re-purpose for something fun? Read on for a scrappy binding tutorial.

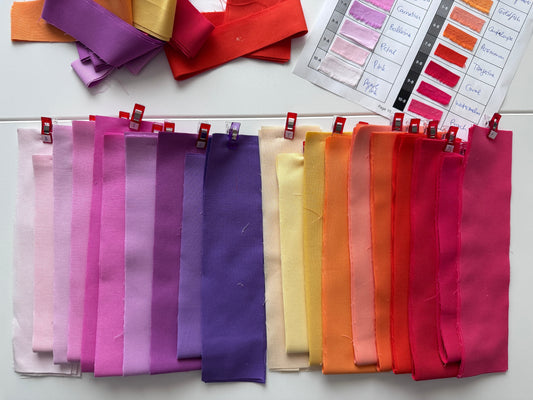
As much as I love using the FPP technique in my Deco Glam quilt, I am left with a lot of oddly shaped scraps at the end of a project. So why not, I asked myself, make some batting out of the scraps? Here are a few tips I gathered throughout the process.

1) Start by sorting colors that look good next to each other, or make each other stand out more! In my case with Deco Glam scraps, I combined contrasting colors of an A fan colorway with each other and contrasting colors of the B fan colorway with each other.

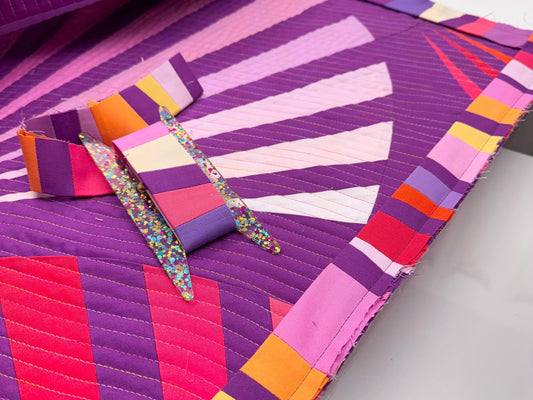
2) Create long, rectangular shapes at least 2 1/2" wide on the short side by sewing together smaller pieces of scraps. You can even sew some together, cut them up, and repeat until you're happy! This is the improv part. I recommend pressing all your seams open in this step. I combined three wonky strips (two colors left and right of a background color) to get a rectangle.

3) Cut 2 3/4" wide rectangles from your previously sewn pieces.
I prefer to have a wider, 3/8" double folded binding strip so there's more space for the bulk of the inner seams to go. This means I need to start with a binding strip with of 2 3/4". If you want single fold binding or 1/4" wide double binding, you can adjust your strip width accordingly.

4) Make enough 2 3/4" wide improv rectangles (or squares, if you prefer) to reach the needed length of your binding: (width of quilt x 2) + (length of quilt x 2) + 10.
For my Throw quilt, the binding length needed was 50+50+74+74+10 = 258 inches. If I used 2 3/4" squares as my improv pieces, they will be 2 1/4" finished, which means I would need 258 : 2 1/4 = 115 pieces. A few extra don't hurt, so you are a bit more flexible with arranging them. I had almost double what I needed from using all my FPP scraps... so I will use those extra squares for another improv project.

5) Lay out the order of your 2 3/4" improv squares in bands (on your table or on a design wall). I chose to alternate A color and B color pieces, and tried to evenly distribute the colors overall. Then sew rectangles together in that order with a 1/4" seam allowance and a short stitch length of 2mm. Press seams open after each step (I love a seam roller for this, because it's quicker than an iron).
Keep in mind that when the binding is finished, you'll only see a 3/8" wide strip through the middle of what you are making. That's the reason all my skinny improv lines are oriented vertically (see below). If I turned them horizontally, they might get lost when the binding is folded.

6) Press your binding strip: carefully flatten all your seams that you previously pre-rolled with a hot iron, for a nice and flat binding strip. Then fold it in half lengthwise (wrong sides together) to prepare your folded binding strip. I like using steam for this last step, so the binding stays folded nicely. After ironing, roll onto itself (or a binding spool) to store it until you're ready to attach your binding.

7) Now proceed with your favorite binding process, as usual.
I like to sew mine to the front and hand stitch it to the back. To sew it to the front, I use the right edge of my 9mm Bernina 1D foot as a guide, which means I'm using a 3/8" seam allowance and have my Dual Feed on. You can use a walking foot as well, just make sure to mark or measure how to get a 3/8" seam allowance with your foot.
Fair warning: hand stitching to the back can be a little harder, because of the thicker binding. The corners might get bulky as well - the batting can be trimmed a little (carefully!) on the inside of the corners, for less bulk. But if you go slowly, it'll be ok!

Now enjoy your sparkly, wonky, scrappy improv binding!

Interested in making your own Deco Glam Quilt? You can find the pattern in my shop!


