Deco Glam Sew-Along - WEEK 1
Share

Week 1
Welcome to week one of our sew-along! This week, we’ll do all the prep.
We get our fabric, print and assemble our FPP templates and cut our fabric strips! If needed, we also make a test fan from SCRAPS to get used to the FPP technique.
Now, let's get quilting!
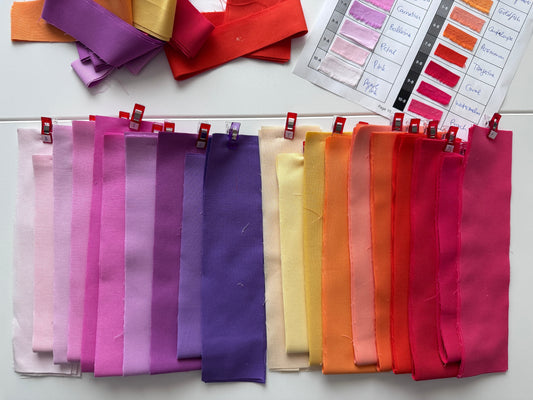
Choose your fabric
 You can find fabric requirements and colorway ideas on pages 2-5. Page 4 clearly explains fabric requirements if you want to make your own colorway. You can mock up your dream colorway with solids or prints on PreQuilt. You can also use the coloring pages on page 26 & 27 to try out colors.
If you want to just get a kit to get started, we are working with fabric shops to make this super easy for you! These are our go-to places to get them:
KITS (US): Sewfinity has kits in KONA and Pear Tree Market has kits in Moda Bella Solids. French Fry Quilt Co offers rainbow themed "Speckled" kits! Use code DECO for 15% off this one.
KITS (Germany): Quiltzauberei has kits in KONA and Floyd The Fox has kits in AGF fabrics.
Print and Assemble FPP Templates (you can do this while you wait for your fabric to arrive!)

Page 11& 12 walks you trough printing your FPP paper templates. I like to use newsprint paper for this, because it’s more lightweight and easier to rip out. But you can also use regular printer paper, if that’s what you have on hand.
After you’ve printed a whole stack of template pages (yes, this is normal), you can use a glue stick or washable glue to attach the templates to each other, until you have large sheets in the number of fans and half-fans needed. You can cut those out along the dashed line with paper scissors.
Optional, but recommended BEFORE you cut your fabric: Test Fan
Print and assemble an extra fan template and make a test block with SCRAP fabric. Please don’t use your “good fabric” for this test fan or you won’t have enough fabric for the quilt later.
You can use just 2 colors and use the instructions on page 6 for cutting the test. Then refer to page 13 and 14 for the FPP technique. This is great for testing if the pre-cut strips are a comfortable size for you and to get into a groove before you use your "good" fabric.
Cut into your "good" fabric
 3-color way: Cut fabric according to your desired quilt size, following cutting instructions on page 6-9.
Ombre-Colorway: Determine the order of your colors first, then cut fabric strips.
- Print out the color reference sheet on page 10. Tack the selvedges of your chosen fabrics on the paper in their order, which will help you keep track for cutting and sewing. They are also marked on the page in order of values, dark to light for A and light to dark for B. If you’re making your own colorway and have all the fans in the same color, don’t forget to invert the color sequence for B to get the best effect.
- Going by your chosen order of fabrics, match them with the strip size you need to cut in the cutting instructions on page 7-9, depending on your quilt size.
On page 9 there is a typo. For Throw size, C3 final strips size is 2 1/4" x 16" (not 2 1/2"x 16")!
Now we’re all set! I’ll see you in Week 2 for sewing the fans!
If you're making a Deco Glam quilt, I'd love to see your progress! If you post on Instagram or Facebook, make sure you tag me @GingerlyQuiltCo, so I can see and reshare your work ❤️


